Thursday, September 24, 2009

Impatient Girl's Dal

And probably in no way actually Dal, but still damn tasty. Pffft, semantics. I tend to bastardize quite a bit of things, especially when I'm in a hurry for food- but you know what they say:
Patience is a virtue.... And what is virtue doing in my kitchen? Shoo! It's a weeknight and I'm hungry.


I had some variation of dal in a restaurant in NJ once, and since then, am totally enchanted with it. From the various kinds I've tried, and some snippets of inside information, I came up with this. It's easy to whip up on a chilly fall night, even if you've had a long day.
Spices are the key to this one.


Garam Masala is a blend I absolutely love. It contains variations of: coriander, pepper, cardamom, cinnamon, mysterious things, caraway, cloves, etc. I cannot get enough of this stuff. As pictured above, I am pretty in love with Penzeys' blend. It's the fundamental flavor behind this, kind of perfume-y, a little bit warm, and a bit complex- Like me? Hm.
In addition to that, there's brown mustard seeds, cumin, and a pinch of ground cloves. Mustard seeds add this curious bit of delicious texture and spice.
And it all goes a little something like this:


Impatient Dal

1 15 oz can of lentils (brown)
1 small yellow onion, chopped
2 or 3 cloves garlic, crushed
1 tsp Brown Mustard Seeds
1.5 tsp Garam Masala
1/2 tsp Cumin
A pinch of ground Cloves
Salt to taste
Canola oil for
sautéing

In a medium sized pot with canola oil, cook the onions, crushed garlic, and mustard seeds on medium until the onion is translucent, about 5 minutes. The mustard seeds may pop around a bit, and that's fine.
Rinse the can of lentils (quickly fill the can with water, and then drain out said water) and add to the pot.
Add the spices & salt, and mix thoroughly. You want the flavors to meld a bit, so turn the heat to low and let it go for about 5 minutes. If you notice that your dal is too dry, you can add a splash of vegetable stock or water.

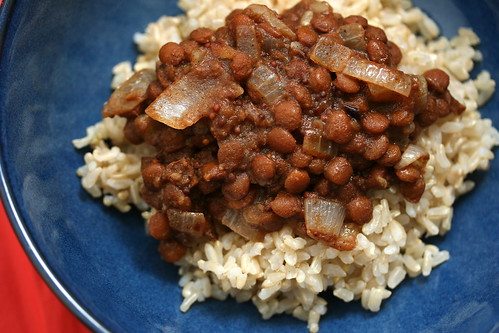
Serve dal over rice- Once again, I prefer Trader Joe's frozen brown rice, it's amazing.

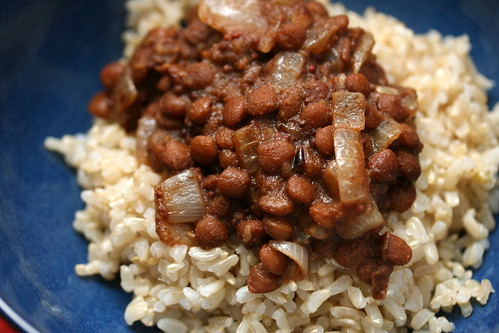
Put your feet up and chow down!

Tuesday, September 15, 2009

A Dangerous Game

If I could enforce upon you one rule, I think it would be this: Know your chilis.
When you reach into that bin at the farmer's market that only says "hot peppers", yet contains a variety of sizes and shapes? Be ever vigilant, or pay the price.

I've made this recipe before with jalapeños, and it was delicious- so when I pulled out a small green pepper shaped kind of like a super tiny bell, I thought it was relatively harmless. It didn't smell like much, so I threw it in seeds and all.
What I didn't know was: Habaneros come in green.


I ate a lot of this, I couldn't stop myself. The flavor was good, but the heat levels were, well, hardcore. I ate it anyway, and I learned my lesson the hard way. There is a charred and shriveled abyss where my stomach once was.

Okay, consider yourself warned. On the upside, when not done with a lethal chili, this is pretty damned addicting. Somewhere between a warm salad and a salsa, it is a hodgepodge of delicious that hinges on some key ingredients, as well as methods.
Let's begin.

A Fire in the Belly

1 Bag of Trader Joe's Fire Roasted Corn
2 red/orange/yellow bell peppers, chopped
Pint of Grape (or cherry) tomatoes, Whole
1 Avocado (diced)
1 Jalapeño (chopped)
Juice of half a lime
2 teaspoons of Mrs. Dash, table blend (yeah, that's right)
Salt to taste
A pinch of smoked salt (optional)
Fresh cilantro leaves, a fistful (optional)
1 package chicken-y strips (like Lightlife)
Earth Balance margarine for sautéing

In a deep saucier, sauté the bell peppers until slightly softened.
Clear a space in the center of your pan, and add around 2 tablespoons of the margarine.
Once that's melted, add the corn. The fire roasted kind really adds a great flavor and depth to this- I recommend it to insane degrees, it's great even on its own.
Add your chopped chili. Heed the warning.
Add the Mrs. Dash. In all seriousness, it's great. It's the only use for this stuff I have. It goes on this corn, it goes on this corn like destiny.
Then salt to taste. I know that's the opposite of what Mrs. Dash is for, but be brave. Rules were meant for breaking. If you have smoked salt, try the tiniest bit here.
Add the juice of half a lime.
The corn won't take long, about 5-7 minutes on medium. You're warming it through, and getting a bit of a crust going. Once this has happened, transfer the mixture to a large bowl.

Clear the pan and put in about a teaspoon of canola oil.
Drop in your grape tomatoes whole, over medium heat.
Sauté these, while keeping them moving (shake the pan or bust out the wooden spoon for this). The object is to get some color to them, and to get them to split from the heat. Once they have, add them to your corn mixture. Tear up a few cilantro leaves and stir in.
Add the diced avocado to the mix, and sprinkle with lime juice.

Clear the pan once again, add some canola oil, and
sauté the chicken-y strips until they are brown on each side. I feel like I've used the word sauté at least 5 times now. I'm not going to count.

Get yourself a bowl, fill with the corn goodness, and top with some chicken-y strips


See if your farmer's market carries any ghost peppers, you know, for next time...

Thursday, September 10, 2009

Pie for Breakfast

I am an advocate.
It's fruit and carbs, the ultimate breakfast (well, it would need to be chocolate for that- but close enough) How could you go wrong?

Pie crust and I have made a compromise, ever since I discovered: Oh hey, you can make pie crust in a food processor...and it actually comes out perfectly! Before, I would scoff at that technique, thinking that the processor would overwork the dough, or that the fat would melt too quickly and the dough would be ruined. Then, one late night where I foolishly wandered into pie territory, I decided that there was no way I was going to stand there with two damned butter knives and have at it. Food processor it was, and food processor it has been since then. And no, I'm not looking back.

The possibilities just got magnitudes easier. How do I celebrate my new found pastry freedom?
I've had it in my head to find some good peaches at the farmer's market this summer, but with each attempt have met failure. Of the pick I've had up until now, they're more weapons than fruit. Peaches that could kill a man- that is, if your were to throw one at a man's head.
Until finally, to usher in the last of summer, I find what I've been looking for.

I could not kill a man with these peaches, unless of course, he was allergic to peaches.

That aside, peach pie is imminent. A fitting farewell to the flakiest of summers. But how to make it special? Back in the day, Snapple (of all things) had a Peach Melba drink, that I believe has since been discontinued (sadface). Peaches and raspberries? I can totally do that.

Ready? Let's do this.

Crust (double)

2 and 3/4 cups flour
1 Tablespoon sugar
3/4 tsp salt
2 sticks (16 tablespoons) Earth balance margarine (cut into 1/4 inch pieces)
1/2 cup very cold water
(soy milk & sugar for brushing & dusting later on)

Combine the flour, sugar, and salt in the bowl of your food processor, and gently pulse to combine.
Add the margarine, and pulse gently until there are smaller crumbs of fat in the flour mixture.
While the processor is running, stream the cold water in. You may not need all of the water, so do so slowly. Just as your mixture forms a ball, stop the processing.
You have a crust, hooray!
Split the dough between two discs- one for the bottom crust, and one for the lattice top. Wrap in plastic wrap, and refrigerate for at least an hour.

In the meantime:
The Filling

6 Peaches, skinned and cut into slices
2/3 cup sugar
3 Tablespoons cornstarch
1 tsp vanilla extract
1 pint raspberries
A handful (1/4 cup) of sliced toasted almonds


Combine the sugar and cornstarch first, to avoid lumps.
Add the peaches and the vanilla, and set aside to juice.
Preheat the oven to 400° F .
Once your dough has rested, flour your work surface and roll out the bottom crust- Turning and flouring (not too much!) as you go along.
Lay crust into your pie plate- now they say you should refrigerate it here. I did not. You be the judge, if rolling has overheated your crust, and it looks like it took a bit of a beating, pop it in the 'fridge for about 10 minutes before proceeding. If not, carry on.

In the meantime, roll out your top crust. Lattice is optional, and I'm evidently a glutton for punishment. Sure, you can act like you're intentionally going for that "Made it myself / 3rd grade arts & crafts" look, but sooner or later, they're bound to catch on.
Perhaps a tutorial is in order: how about this one?

Remove your pie vessel from the fridge, and fill with your peach mixture.
You can dot it with margarine, I always forget, it's still delicious. I mean, there's like an entire container's worth in the crust. Come on now.
No, I haven't forgotten the raspberries. Dot the raspberries in whatever fashion you like over the peach filling, and sprinkle with the toasted sliced almonds. Just a hint. Be mysterious.
Lay, or lattice, your top crust, brush with soy milk (or coconut milk, if you're feeling fancy), and sprinkle with sugar.
I have since discovered that since I don't pre-bake my crust, I don't actually need a tinfoil pie tent to protect it from burning.
Place on center rack in the over and bake for 30 minutes.
Lower the oven temperature to 375
° F, and rotate the pan 180°
Bake for about 35 - 40 minutes until crust is golden brown, and filling is thick and bubbly.
Remove and transfer the pie plate to a trivet or cooling rack to prevent soggy bottoms.


Le breakfast, she is served. With this to start the day, how can it be anything but a good morning?
Take that, Monday.