Tuesday, October 13, 2009

VeganMoFo: First Stew of the Season

The weather is chilly, the days are short, and it's definitely stew time. We've got a farmer's market going til Thanksgiving here, and I'm way too excited for fall veggies. I was able to find some fresh cranberry beans, which are gorgeous:


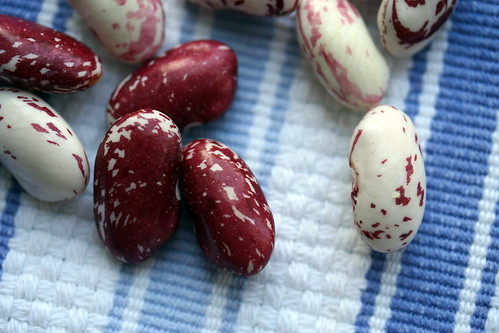
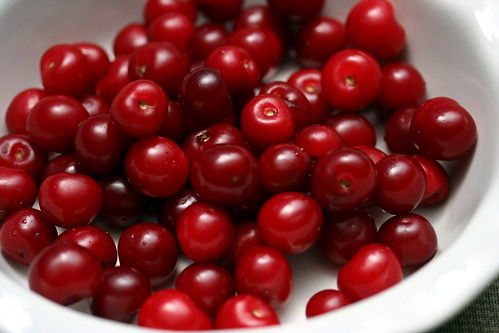
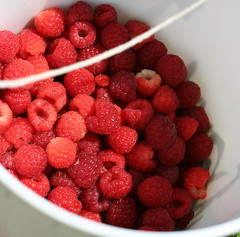
There's something therapeutic about shelling beans. It's this good ol' hands-on feeling, like I need me a porch, a rocking chair, and some lemonade. That I do.
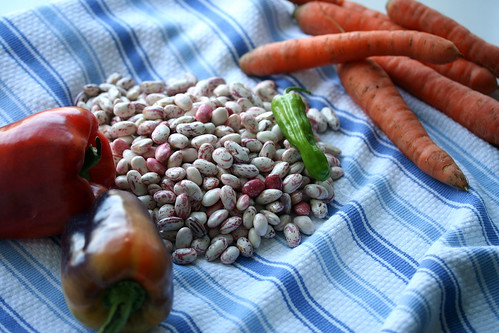
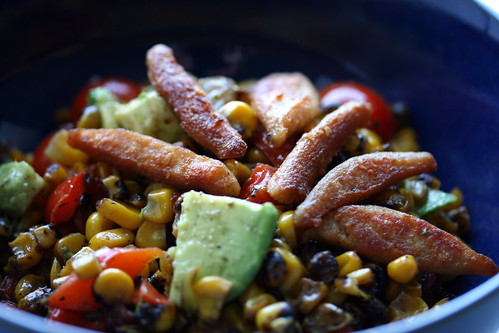
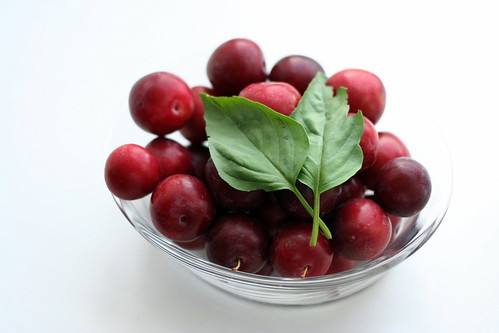
These, along with the rest of my haul, were destined to become the first stew of the season:


The First Stew

1 Medium yellow onion
2 large garlic cloves
6 carrots
2 bell peppers
2 cups cranberry beans, shelled
1 zucchini
1 tiny jalapeño pepper
2 cups vegetable stock
Shredded fresh basil ( a good fistful)
1 tsp dried marjoram
1 cup reserved cooking liquid from beans
Olive oil for cooking the vegetables
Fresh parsley for garnish


Fill a large stock pot with warm water, and set on high heat to boil. Once it boils, add the 2 cups of shelled cranberry beans- do not add salt! It makes the beans take longer to cook / toughens them. Turn the heat to medium, where you should reach a rolling boil, and let boil for 45 minutes or so. Taste the beans for texture at around 40 minutes, and keep testing. You want them to be soft and creamy- and that can take up to an hour. It's worth the wait. Tough beans, while an awesome comeback, are not very tasty.
Meanwhile:
Chop the onion, and put your garlic through a garlic press. If you don't have a garlic press, you should get one (but we'll let you chop it this time.) Like a friend of mine said: "it will change your life." It has. It intensifies the garlic flavor, interestingly enough, which is perfect for this application.
Chop your carrots and bell peppers into roughly the same sized pieces- set aside.
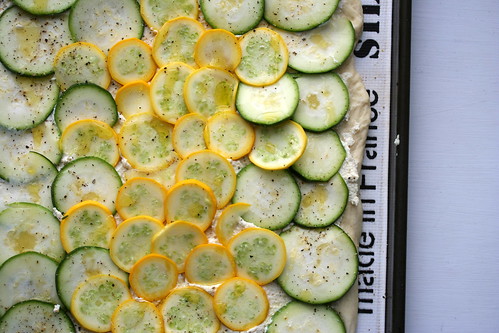
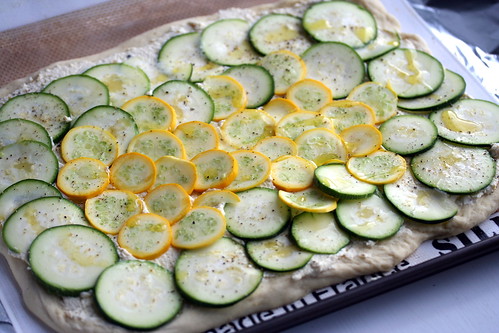
Slice your zucchini into rounds, dice your jalapeño and set aside
In a large deep pot, cover the bottom with olive oil, turn to medium heat, and add your onions and garlic.
Once the onions have softened, add the bell pepper and carrots, and let cook until slightly softened, around 7 minutes.
Add the 2 cups veggie stock, marjoram, and salt & pepper to taste. Let the carrots & peppers get tender, about another 5-7 minutes.
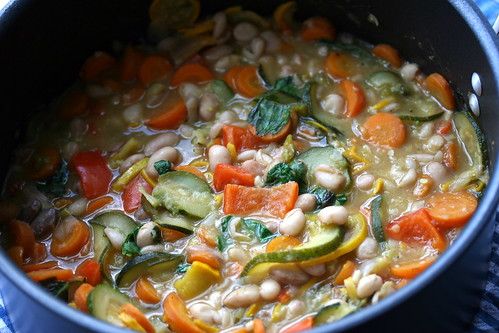
Add the cooked beans, zucchini rounds, diced jalapeño, and fresh basil. If the mixture seems on the dry side, add the reserved bean cooking liquid here.
Taste for seasoning and adjust salt/pepper if necessary.
The zucchini takes very little time to cook, and the beans are already done, you want to heat everything through and incorporate the flavors.
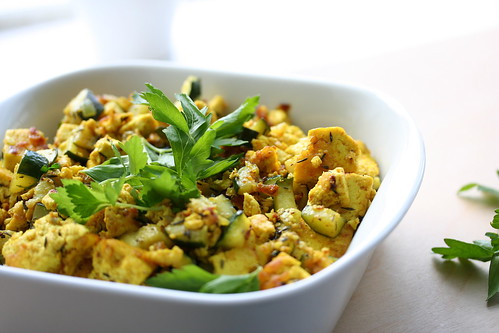
Garnish with fresh parsley, the underdog of the herb world, under-rated and delicious.


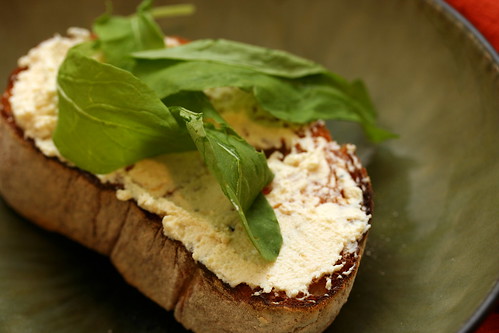
Cozy up with a big ol' slice of toasted crusty bread and dig in!


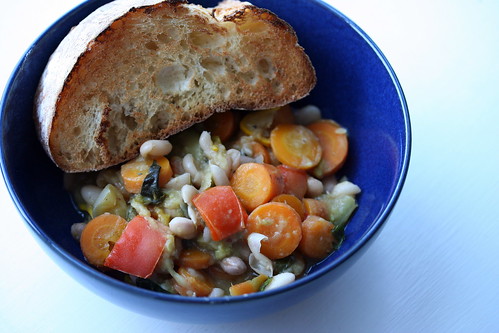
Sure it's simple, it's warm, delicious, and it's just what the weather called for. Plus, you can make this recipe even quicker if you use canned cannellini beans, what's not to love?

Wednesday, October 7, 2009

VeganMoFo #3 - Fall Quick Fixes

Today was the subtle, yet sudden clicking of: Oh, hello Fall. So nice to see you.

At some point earlier, I went out and bought a bunch of pumpkin butter. Usually, I do crumpets & pumpkin butter, all proper like - But today, a light switch magically flicked on, and I was illuminated. I did two simple, obvious, amazing things- and I have no idea why I'd never done them before.


One: Cold mornings on a work day, I'm an instant oatmeal packet kind of a girl. This time around, I got plain instant oatmeal, prepared it to directions, and added a couple of teaspoons of this deliciousness:

and suddenly, the morning was glorious.

Two: And do you miss those damn famous Pumpkin Spice Lattes?
Yeah, so do I.
You know what?
THIS IS WHAT

1 to 2 Tablespoons of Pumpkin butter
Soy or Coconut milk coffee creamer for drip coffee, or Regular soy milk if you are able to steam it
6 to 8 oz hot coffee or espresso shots

In a mug, mix the pumpkin butter with a splash of the creamer, and mix until pumpkin is completely incorporated.
Pour your hot coffee (or espresso shots) into your mug
Top off with creamer, or steamed soy mlik.

I was at work, so I did this with a K-Cup, and it was still fantastic. If you are super sneaky, carry a jar into SB and sneak some into your regular soy latte. I haven't tried that, but believe me, that's my next step. Yes, you should always have a jar of pumpkin butter with you. It's October. Why wouldn't you have one?

And to conclude our pumpkin adventure, on a bit of a tease-y note:


Pumpkin risotto, made by my visiting mother. And it's awesome.

What have we learned? Pumpkin is amazing in just about everything. But we already knew that.

On a fall related note, I picked up a can of this:


and have no idea what to do with it? Chestnut spread... It seems so full of potential- but what to do... I'm thinking cake-y type applications- Has anyone ever worked with this stuff?

Monday, October 5, 2009

VeganMoFo #2 - Some Goals

Well, It is my first VeganMoFo. It's also my 10th year being vegan, my 'Vegaversary', if you will. There should be a tiny party, but instead, I'm going to sit here and drink my lavender hot chocolate, imported from the UK by my friend Laura:

Not too shabby, really. It's flaked chocolate and pretty damned amazing.

Well MoFo of the vegan variety, I'm thinking I'd like to go out of my comfort zone with this challenge. Maybe try over the top things like Tofu Wellington, or even give bread-making another shot. Heck, I've got a vegan turducken idea in my head for a while now. It could be a kitchen disaster lesson for us all...
Or it may be a month of me cooking most nights, and posting about 2 to 3 of said nights. That may be a more fair set of goals, and recipes rather than me blathering on about how there will be recipes.

However, in the meantime, I've made:


Pumpkin spice chocolate chip walnut muffins, what I've affectionately dubbed as 'Forbidden Muffins'.
I sense more pumpkin in our future. I also sense a second attempt at chocolate bread.
You will be mine, chocolate bread. Oh yes, you will be mine...

Thursday, October 1, 2009

Kale, a love affair.

For my very first:
Allow me tell you about one of my very favorite things: Kale.

I like it. A lot.

If I had to choose only one vegetable- I'd be very sad, and then I'd pick kale. Man, but Brussels sprouts would be a close second. Oh! and butternut squash... Flippancy aside, kale is where it's at. Chock full of iron and vitamins, and what I'm after, deliciousness.
My favorite bits are the super young stems.

They are tender as all get out.

This is a mega simple standby regardless of the time of the year- Although, kale is a winter vegetable, so it's only gonna get better from here on out
More often than not, you see it as a garnish, or hear people say: What the hell am I supposed to do with this?
This. This is what you're supposed to do with it.

Kale is the Best

1 Bunch o' Kale
(not
flat - Lacinato- kale, but curly kale as pictured above)
1-2 cloves of garlic, sliced thin
Olive Oil for
sautéing
Salt to taste
Toasted sesame seeds

Washing the kale is critical. Those oh-so-fun curly leaves hide hordes of the unknown. I've found: lady bugs, caterpillars, cocoons, much dirt, and other fun stuff that you should just go put back outside.
Separate the leaf from the stems. Unless they are very tiny leaves, the stems are too woody for this quick cooking application. I tear them away in bigger chunks.
Let them drain on a tea towel, and slice your garlic.
In a large saucier (you want high sides for this), start the garlic in the oil on medium heat.
The heat for this recipe is going to stay towards the higher end. We want to do this quickly, so that the greens stay vibrant. Keep things moving around with your wooden spoon.
Once the garlic starts to sizzle, add your kale in batches.
Basically, it goes like this:
Fill up the pan with kale.
Toss the kale about until it wilts.
Add more oil if your kale seems dry.
Add more kale and toss about.
Repeat until there's no more kale.
It will sizzle and pop, because water hides really well on the leaves, but the more kale you add, the less space it has to pop.
Once you've got all the kale in the pan and it's wilted down, add salt to taste.
Turn off the heat, and add sesame seeds (a Tablespoon or two)

I get mine at the Asian market because it is a crazy good deal, and I go through these like nobody's business.
I like slightly crispy bits to my kale, so sometimes I let the kale batches brown the slightest bit before I add more.


There have been summers where I've survived solely on this stuff. While that's not exactly the best idea, it is still quite delicious- and if you're hesitant to try this mysterious green, this is a great, simple introduction to it.

Thursday, September 24, 2009

Impatient Girl's Dal

And probably in no way actually Dal, but still damn tasty. Pffft, semantics. I tend to bastardize quite a bit of things, especially when I'm in a hurry for food- but you know what they say:
Patience is a virtue.... And what is virtue doing in my kitchen? Shoo! It's a weeknight and I'm hungry.


I had some variation of dal in a restaurant in NJ once, and since then, am totally enchanted with it. From the various kinds I've tried, and some snippets of inside information, I came up with this. It's easy to whip up on a chilly fall night, even if you've had a long day.
Spices are the key to this one.


Garam Masala is a blend I absolutely love. It contains variations of: coriander, pepper, cardamom, cinnamon, mysterious things, caraway, cloves, etc. I cannot get enough of this stuff. As pictured above, I am pretty in love with Penzeys' blend. It's the fundamental flavor behind this, kind of perfume-y, a little bit warm, and a bit complex- Like me? Hm.
In addition to that, there's brown mustard seeds, cumin, and a pinch of ground cloves. Mustard seeds add this curious bit of delicious texture and spice.
And it all goes a little something like this:


Impatient Dal

1 15 oz can of lentils (brown)
1 small yellow onion, chopped
2 or 3 cloves garlic, crushed
1 tsp Brown Mustard Seeds
1.5 tsp Garam Masala
1/2 tsp Cumin
A pinch of ground Cloves
Salt to taste
Canola oil for
sautéing

In a medium sized pot with canola oil, cook the onions, crushed garlic, and mustard seeds on medium until the onion is translucent, about 5 minutes. The mustard seeds may pop around a bit, and that's fine.
Rinse the can of lentils (quickly fill the can with water, and then drain out said water) and add to the pot.
Add the spices & salt, and mix thoroughly. You want the flavors to meld a bit, so turn the heat to low and let it go for about 5 minutes. If you notice that your dal is too dry, you can add a splash of vegetable stock or water.

Serve dal over rice- Once again, I prefer Trader Joe's frozen brown rice, it's amazing.

Put your feet up and chow down!

Tuesday, September 15, 2009

A Dangerous Game

If I could enforce upon you one rule, I think it would be this: Know your chilis.
When you reach into that bin at the farmer's market that only says "hot peppers", yet contains a variety of sizes and shapes? Be ever vigilant, or pay the price.

I've made this recipe before with jalapeños, and it was delicious- so when I pulled out a small green pepper shaped kind of like a super tiny bell, I thought it was relatively harmless. It didn't smell like much, so I threw it in seeds and all.
What I didn't know was: Habaneros come in green.


I ate a lot of this, I couldn't stop myself. The flavor was good, but the heat levels were, well, hardcore. I ate it anyway, and I learned my lesson the hard way. There is a charred and shriveled abyss where my stomach once was.

Okay, consider yourself warned. On the upside, when not done with a lethal chili, this is pretty damned addicting. Somewhere between a warm salad and a salsa, it is a hodgepodge of delicious that hinges on some key ingredients, as well as methods.
Let's begin.

A Fire in the Belly

1 Bag of Trader Joe's Fire Roasted Corn
2 red/orange/yellow bell peppers, chopped
Pint of Grape (or cherry) tomatoes, Whole
1 Avocado (diced)
1 Jalapeño (chopped)
Juice of half a lime
2 teaspoons of Mrs. Dash, table blend (yeah, that's right)
Salt to taste
A pinch of smoked salt (optional)
Fresh cilantro leaves, a fistful (optional)
1 package chicken-y strips (like Lightlife)
Earth Balance margarine for sautéing

In a deep saucier, sauté the bell peppers until slightly softened.
Clear a space in the center of your pan, and add around 2 tablespoons of the margarine.
Once that's melted, add the corn. The fire roasted kind really adds a great flavor and depth to this- I recommend it to insane degrees, it's great even on its own.
Add your chopped chili. Heed the warning.
Add the Mrs. Dash. In all seriousness, it's great. It's the only use for this stuff I have. It goes on this corn, it goes on this corn like destiny.
Then salt to taste. I know that's the opposite of what Mrs. Dash is for, but be brave. Rules were meant for breaking. If you have smoked salt, try the tiniest bit here.
Add the juice of half a lime.
The corn won't take long, about 5-7 minutes on medium. You're warming it through, and getting a bit of a crust going. Once this has happened, transfer the mixture to a large bowl.

Clear the pan and put in about a teaspoon of canola oil.
Drop in your grape tomatoes whole, over medium heat.
Sauté these, while keeping them moving (shake the pan or bust out the wooden spoon for this). The object is to get some color to them, and to get them to split from the heat. Once they have, add them to your corn mixture. Tear up a few cilantro leaves and stir in.
Add the diced avocado to the mix, and sprinkle with lime juice.

Clear the pan once again, add some canola oil, and
sauté the chicken-y strips until they are brown on each side. I feel like I've used the word sauté at least 5 times now. I'm not going to count.

Get yourself a bowl, fill with the corn goodness, and top with some chicken-y strips


See if your farmer's market carries any ghost peppers, you know, for next time...

Thursday, September 10, 2009

Pie for Breakfast

I am an advocate.
It's fruit and carbs, the ultimate breakfast (well, it would need to be chocolate for that- but close enough) How could you go wrong?

Pie crust and I have made a compromise, ever since I discovered: Oh hey, you can make pie crust in a food processor...and it actually comes out perfectly! Before, I would scoff at that technique, thinking that the processor would overwork the dough, or that the fat would melt too quickly and the dough would be ruined. Then, one late night where I foolishly wandered into pie territory, I decided that there was no way I was going to stand there with two damned butter knives and have at it. Food processor it was, and food processor it has been since then. And no, I'm not looking back.

The possibilities just got magnitudes easier. How do I celebrate my new found pastry freedom?
I've had it in my head to find some good peaches at the farmer's market this summer, but with each attempt have met failure. Of the pick I've had up until now, they're more weapons than fruit. Peaches that could kill a man- that is, if your were to throw one at a man's head.
Until finally, to usher in the last of summer, I find what I've been looking for.

I could not kill a man with these peaches, unless of course, he was allergic to peaches.

That aside, peach pie is imminent. A fitting farewell to the flakiest of summers. But how to make it special? Back in the day, Snapple (of all things) had a Peach Melba drink, that I believe has since been discontinued (sadface). Peaches and raspberries? I can totally do that.

Ready? Let's do this.

Crust (double)

2 and 3/4 cups flour
1 Tablespoon sugar
3/4 tsp salt
2 sticks (16 tablespoons) Earth balance margarine (cut into 1/4 inch pieces)
1/2 cup very cold water
(soy milk & sugar for brushing & dusting later on)

Combine the flour, sugar, and salt in the bowl of your food processor, and gently pulse to combine.
Add the margarine, and pulse gently until there are smaller crumbs of fat in the flour mixture.
While the processor is running, stream the cold water in. You may not need all of the water, so do so slowly. Just as your mixture forms a ball, stop the processing.
You have a crust, hooray!
Split the dough between two discs- one for the bottom crust, and one for the lattice top. Wrap in plastic wrap, and refrigerate for at least an hour.

In the meantime:
The Filling

6 Peaches, skinned and cut into slices
2/3 cup sugar
3 Tablespoons cornstarch
1 tsp vanilla extract
1 pint raspberries
A handful (1/4 cup) of sliced toasted almonds


Combine the sugar and cornstarch first, to avoid lumps.
Add the peaches and the vanilla, and set aside to juice.
Preheat the oven to 400° F .
Once your dough has rested, flour your work surface and roll out the bottom crust- Turning and flouring (not too much!) as you go along.
Lay crust into your pie plate- now they say you should refrigerate it here. I did not. You be the judge, if rolling has overheated your crust, and it looks like it took a bit of a beating, pop it in the 'fridge for about 10 minutes before proceeding. If not, carry on.

In the meantime, roll out your top crust. Lattice is optional, and I'm evidently a glutton for punishment. Sure, you can act like you're intentionally going for that "Made it myself / 3rd grade arts & crafts" look, but sooner or later, they're bound to catch on.
Perhaps a tutorial is in order: how about this one?

Remove your pie vessel from the fridge, and fill with your peach mixture.
You can dot it with margarine, I always forget, it's still delicious. I mean, there's like an entire container's worth in the crust. Come on now.
No, I haven't forgotten the raspberries. Dot the raspberries in whatever fashion you like over the peach filling, and sprinkle with the toasted sliced almonds. Just a hint. Be mysterious.
Lay, or lattice, your top crust, brush with soy milk (or coconut milk, if you're feeling fancy), and sprinkle with sugar.
I have since discovered that since I don't pre-bake my crust, I don't actually need a tinfoil pie tent to protect it from burning.
Place on center rack in the over and bake for 30 minutes.
Lower the oven temperature to 375
° F, and rotate the pan 180°
Bake for about 35 - 40 minutes until crust is golden brown, and filling is thick and bubbly.
Remove and transfer the pie plate to a trivet or cooling rack to prevent soggy bottoms.


Le breakfast, she is served. With this to start the day, how can it be anything but a good morning?
Take that, Monday.

Sunday, August 30, 2009

Venture into Spelt Country

Zucchini is currently kind of an epidemic in my fridge. In all seriousness, this, the most persistent of squash, is showing up in almost everything that I make.
Do you have this problem?
Fight back with zucchini bread.
I don't know about you, but I haven't had the stuff since 3rd grade with Mrs. Nicholson. Even then, all that I remember about it is that it was delicious and I wanted more. So in the face of this mass zucchini takeover, I decided to finally satisfy 9 year old Vanessa's craving.
Now, in an effort to be healthier- or at least, more nutritious, I used spelt flour. This is my first time using it, and to be totally honest, I have no idea how this is healthier than unbleached flour. I did hear, however, that it was tastier, and tastier was more a driving force than the health part. I mean, we're vegan. Come on now.

I adapted this from The Compassionate Cook (the first vegan cookbook I ever got, and the one I turn to the most) changing the flour type, sugar, and oil levels. This recipe makes 4 of those cute little tiny loaf pans that I really have no idea why I have. Actually, it made 3 tiny monster overflowing loaves-

Come play with us, Danny...

I recommend using 4. Barring that, try your hand at 2 regular size loaves.

Zucchini Bread

2 cups Zucchini (grated)
3 cups Spelt flour
3/4 cup sugar
1/2 cup maple syrup
1/2 cup soy milk
3/4 cup vegetable oil
3 tsp Egg Replacer
1 tsp salt
1 tsp vanilla
1 Tablespoon baking powder
1 tsp nutmeg
1 Tablespoon cinnamon
1 cup walnuts

Preheat the oven to 350º F and grease the loaf pans.
Mix the dry ingredients together in a large bowl (except the walnuts) and mix the wet ingredients in another.
Add the wet to the dry, and the walnuts, and mix until just combined.
Fill the pans of your choice. For large loaves: 50 - 60 minutes, and for smaller 30-40 minutes, or until a toothpick inserted comes out clean.
As it turns out, the spelt in this recipe behaves a lot like all purpose flour. The dough rose fine, and it wasn't overly dense, dry, or crumbly. In fact, it was a bit tastier, I'd say almost nuttier- but in a very subtle way. So for those of you wanting to venture out into the world of alternative flours, why not give it a shot?


Indulge your childhood memories, clear out your fridge- everybody wins.


Saturday, August 29, 2009

Glory in Simplicity


Some nights when kicking around the house, a bite to eat here and there just needs to be simple, fresh, and good. We've got your back on that one. Left over pseudo-ricotta from the pizza and some of the remaining framer's market haul fit together perfectly into a simple snack-y type deal I've been calling: toasties.
We used the ricotta from the weekend's pizza, some arugula, a nice fresh loaf of ciabatta and came up with:


This isn't really a recipe, it's more of an assembly line. You'll need a good crusty bread for this- I'm sure it would be fine on plain ol' white toast, but let's go for broke, shall we?

The Goods

1 loaf Ciabatta
Left over or freshly made Pseudo-ricotta (recipe)
1 Bunch arugula
Drizzle of extra virgin olive oil

Cut your Ciabatta on the bias (at an angle) More surface area = more goodies = happyface.
Toast slices until lightly golden.
While still warm, spread a thin layer of the pseudo-ricotta, top with the arugula, and drizzle with olive oil.
Crunch on in.
Repeat as needed.

Along this idea of Toasties, we tried a classic bruschetta. You keep that sigh of boredom to yourself, these have a firm basis in the delicious. That bias cut ciabatta bread? Fry it. In olive oil. Do it. Do it like this:
Second Batch o' Goods

Sliced Ciabatta bread
Olive Oil for frying
A pint of cherry or grape tomatoes, halved
Roughly 6-10 leaves of basil
A clove of garlic
Drizzle of extra virgin olive oil
Salt & pepper to taste

Slice your tomatoes in half and set aside in a bowl.
Stack your basil one leaf on top of the other, and roll them up from the bottom stem to the tip. With either a paring knife, or my choice- kitchen shears, thinly slice (chiffonade) the rolled up basil. Sprinkle the basil over the tomatoes, add oil, salt and pepper, and set aside.
For the bread, get your largest skillet- if you have a cast iron one, now would be the time.
Be careful not to overdo it with the olive oil! Too much will overpower the bread and even leave it vaguely bitter. You want to cover the whole bottom of the pan with only the tiniest bit in excess.
Arrange your slices in the pan and toast (yeah, fry) them until golden brown on each side. We're aiming to only flip them once, so keep your eye on them.
Lay the hot bread out on a plate to cool slightly. You could use a cooling rack, mine never got that far.
While cooling, cut the garlic clove in half and rub it over the surface of the hot bread (use tongs, unless you have asbestos hands) Believe it or not, you don't have to press it into the bread to get the flavor. The heat of the bread and the oil of the garlic clove work out just right, a few swipes will do it.
Choose your bread wisely, and top with a spoonful of your tomatoes.
Sometimes the simple can be the divine.


There are probably a mazillion possibilities out there. A fav of mine for breakfast is: Plain ol' toast with white chocolate peanut butter (yep, it's vegan) dotted with fresh blueberries.


What's your favorite?

Monday, August 24, 2009

White Pizza with Dual Color Zucchini

I came across this recipe a bit ago and thought to myself: When was the last time I had white pizza? Was it at Sal's as a 7 year old? Really?
Well, it's quite possible.
It's definitely been longer than since I last had a donut.

Since I saw that, I have been planning and plotting. The key to this recipe is the very thinly sliced zucchini artfully layered across the surface. That way there's no pre-cooking, and no overly raw crunchy zucchini on top of your otherwise perfect pizza.
Now, I thought I would be clever because I have a food processor with mandolin disc blades to do the hard work for me. A food processor that has pretty much been following me where ever I moved since 2001. Well, you see, if you don't have this one plastic stem-like attachment, you pretty much just have a shiny disc blade that no matter how hard you try to cram it into your Cuisinart, just won't stay. You may lose a finger trying to do that too, if you're not careful. Those suckers are sharp.
If you find yourself in the same situation, I advise you to make peace with your knife skills now.

Ready?

White Pizza with Dual Color Zucchini

1 Recipe of Pizza Dough (I picked up a ready made one from Trader Joe's- super simple)
Cornmeal for dusting
2 medium zucchini (one gold, one green)
Juice of 1/2 Lemon

Pseudo-Ricotta
1 16 oz Tub of Tofu
1 tsp salt
A few grinds of cracked black pepper
3 Tablespoons of toasted pine nuts
1/4 cup + 1 heaping tablespoon of Tofutti Cream Cheese
2 - 3 Tablespoons of extra virgin olive oil


Preheat your oven to 450 °F
If you have a pizza stone, you're in luck! If not, you can use a silpat lined cookie sheet.
Lightly dust the silpat with some cornmeal.
Stretch out you dough to the desired shape and let it relax a bit while you chop the veg.
As above, if you're lucky enough to have some sort of mandolin, employ it now- aim for 1/4 inch slices. Elsewise, get in some quality time with your chef's knife.

For the Tofu Ricotta:
This is something I came up with over Christmas a few years back. It's not exactly ricotta, as my Italian mother will inform me of each time, but the tangy-ness from the tofutti cream cheese, and the body from the pine nuts makes it a damn fine substitute, if I don't say so myself.
Drain the tofu (like we did here) and crumble into a food processor (a blender could also work here)
Add all the ingredients except the oil, and pulse to combine.
Drizzle in the oil while blending, and process until you've got a smooth texture.
Spread a layer of the tofu ricotta over the pizza dough- don't lay it on too thick, or your dough will remain somewhat gooey.
Layer on your zucchini slices. You can be fancy, or you can be utilitarian, knock yourself out.


Drizzle the top lightly with olive oil, a bit the juice from the half lemon, and a few grinds of cracked black pepper.


It might be a breadtangle of pizza...
Bake for 15 - 20 minutes, rotating the pizza after 10 minutes.


I'm now inspired to get the missing piece for my Cuisinart, just so I can do this more often. Either that, or my knife skills will become legendary. Legendary.

Tuesday, August 11, 2009

Who needs a weekday supper?

I do!
After work, rush hour traffic, filling up the car so you can actually get home, and getting the team's lotto tickets because hope is like a fever, a girl gets hungry. This must be one of the most bastardized recipes in my repertoire- and it's not that I just sneak the word 'bastard' in where ever I can, because I do, but it is.


Le tale:
Back in the college days at MHC, there was a Caribbean food festival that involved cooking, and eating. I really don't see how you could go wrong with this. At that time, it was snowy as hell, and we were all crowded around the telly of the FP house, watching subtitled Jackie Chan movies. How. Can you. Go wrong.
You can't.
Somewhere in the realm of 2am on a Weds morning, things were abuzz. Delicious things. I found my house mate Alana, who hails from Trinidad, cooking something amazing. It smelled of coconut, spices, and warmth. It radiated through that 190 something year old kitchen (not even kidding), and lured me closer. She told me that It was red beans cooked in coconut milk with an array of spices, and a bit of a kick- it was to be served on Mac & Cheese. 'This part is vegan' she said, 'try it!'
You know those warm, fuzzy, somewhat surreal nights that just stand out in your head even though in the grand scheme of things, so much more has happened? This was one of them.

This is my approximation of the recipe. If you too hail from Trinidad, and you come across this somehow, try not to hold it against me for wanting to mimic the amazing dish, but only going on the memory of taste. Also, let me know the real version!

(Bastardized) Trinidadian Beans

1 can of red Kidney beans
1/2 can of coconut milk
3 cloves of garlic, chopped
1 tsp ground Allspice
1/2 tsp Thyme
Red chili flakes to taste
Salt & Pepper to taste
1/4 tsp Fresh grated Nutmeg at the end

It occurs to me that at some point, I used to add ginger to this. I didn't tonight, and it was delicious. Try a dash if you like.
In a small nonstick pot with just a dash (tsp) of olive oil, briefly
sauté the garlic over medium heat.
Rinse the beans and add them to the pot.
Add the half can of coconut milk and spices to the beans. You want to cover all the beans, and have enough for a decent amount of sauce. Also, it turns an awesome mauve color at this point. How often do you get to say that? Mauve.
Taste for salt / heat levels, and adjust accordingly.
Now, everything in here is cooked, so you really just want to let the sauce thicken a bit, and for the flavors to develop. Simmer on medium / medium low for about 5 to 7 minutes.
Serve this over brown rice. Specifically, my saving grace from Trader Joe's. Highly recommend.


There's something extremely comforting about this dish, even in the swelter of summer.

Saturday, August 8, 2009

Plum Cake, hold the Kuchen

Someday I shall be brave enough to try making a baked good with yeast. Today is not that day.
This is the day I give you, plum cake.
First, the origins. There've been a bunch of recipes for plum kuchen floating about- and also, I found these at the farmers market:


and they were too cute to pass up.
Yes, that is excuse enough for cake.
Cute. Cake. Done.

So here we go:

Plum Cake

1.5 cups flour
1 Tablespoon baking powder
1/2 Stick (4 Tablespoons)
Earth Balance
2/3 cup sugar
3/4 cup soy milk with 2 tsp lime juice
1/2 tsp salt
1/4 tsp cinnamon
1 tsp vanilla extract

A pint of tiny plums! (you can use any plum. I used above tiny sugar plums)
(they were actually a little tart)
(I felt lied to)

Preheat over to 375° F
Grease/flour a round 9 inch cake pan.
If you haven't already, combine the 3/4 cup soy milk with the 2 tsp of lime juice. Give it a stir, and set it aside to separate.
In a mixer, or with a hand mixer, or with a fork and some bicep action, cream the Earth Balance on its own until whipped / paler in color.
Add the sugar and continue to beat for anywhere between 2 - 5 minutes, until throughly incorporated and pretty fluffy.
Combine the flour, baking powder, salt, and cinnamon in a bowl.
In the mixer, or the bowl you've been buffing out that one arm with, add roughly a third of the soy milk mixture and the teaspoon of vanilla.
Add about a third of the dry ingredients to that and turn the mixer on low to just barely combine.
Repeat this until you've incorporated all the ingredients. You want to end with the dry ingredients, and take care not to over mix!
This will be a bit of a thick batter-it's okay, the plums are juicy. Pour it into your prepped cake pan.

As for the plums: Sometimes, there is a bit of bitterness in the skins. I find this to be a bit odd, sugar plums... Pop one in your mouth to verify if you too have this issue. You may want to take that extra step to peel them. If you don't peel them, it's not really a problem. It adds an interesting dimension to the sweet cake and the concentrated fruit. You're going to pit and halve your plums. Arrange them as you like on top of your cake batter and sprinkle with sugar.
Told you they were juicy.

Bake at
375° F for 30 - 35 minutes, or until an inserted toothpick comes out clean.
Let the cake cool in the pan for about 10 minutes.

Then gently turn out onto a wire rack.

It looks like it's smiling, and yes, I tried a nub from the bottom. It was delicious.
You have successfully avoided making kuchen. You have not confronted your fear of yeast. You have passively aggressively (and 2nd person-edly) challenged yourself to make a risen baked product in the near future. (foreshadowing)

I mean, enjoy!


In the meantime, come visit us at Hungryface!


Sunday, August 2, 2009

Wherein I confront: Pie.

For a long time, I have stood on the edge of abyss, contemplating the perils that lay within: Cold pseudo-butter, ice water, a touch of sugar, and flour. Pie Crust.
Doom.

I'm a long time fan of pie- from the pot pies of childhood, to the chocolate peanut butter death I concocted a couple years back- but I have never, ever, made a crust. So, I fled to my mountain sanctuary ( ie: I went to Vermont on a vacation) with one goal in mind: Make a damn pie. From Scratch.

While there, I came across this farm stand, and kind of fell in love.

I may or may not have left with a box of goodies

I was taken with the fresh, and extremely local fruit, and selected a few possibilities for pie. Having never tried red currants before, I was surprised to find that they were (crazy) sour. Blueberries? Pretty out of this world good. And cherries... Well, I did have a cherry pitter on hand, and they're really cute looking, so let's go with those.

My guide for this pastry-venture was This Book, which contains an awe-inspiring amount of pies. While they're not vegan offhand, the fruit pies are easily modified. As I set about to selecting which of the cherry pies to make, I noticed that my cherries were on the tinier side, and sort of brighter red than any variety back home. A taste revealed, hellowearequiteSOURhowdoyoulikemenow?
Hm.
Oh look at that, sour cherry pie recipe. Thanks, book of a million pies.

So let's get down to business, shall we?


From Ken Headrich (Halved, as my destination was not a deep dish vessel)
Sour Cherry Pie

Crust
(single)
1.5 cups flour
1.5 teaspoons sugar
1/4 tsp salt
1 stick (8 tablespoons) Earth balance (cut into 1/4 inch pieces)
1/4 cup very cold water


Filling
3 cups pitted sour cherries
2/3 cup + 1 Tablespoon sugar
1/8 cup cornstarch (tricky business)
1 tsp fresh lime (original calls for lemon, but you work with what you've got)
Grated zest of 1 lime/lemon
2 Tablespoons cold
Earth Balance

Start the crust first. I was using a cute little 7 or 8 inch pie dish, so once recipe yielded enough for a bottom and lattice top crust. If you're using a conventional pie dish, double said recipe.
In a large bowl, combine the flour and sugar until well incorporated.
Scatter the cold earth balance over the dry ingredients and toss a bit.
Using a pastry cutter, or two butter knives (kind of annoying, but the route I went), cut the fat into the flour until the fat pieces are roughly pea sized all throughout.
Sprinkle a third of the cold water over the mixture and toss (with a fork or spatula) to dampen. Do this twice more, toss and mixing, from the bottom of the bowl up to the top. If the dough comes together easily, or is packable, you're good for the next step- If not, add a teaspoon of water and repeat until dough is packable. Don't over mix the dough! If it can hold a ball shape, it's good. It may be a little crumbly, but it will be ok.
Divide the dough into 2 pieces, a smaller one for the lattice top, and a larger one for the bottom crust, wrap in plastic wrap, and stick in the fridge. Let the dough rest for at least one hour.

While the dough is resting, get yourself a chair and a cherry pitter and have at it.
In another bowl, combine the sugar with the cornstarch. Mixing the cornstarch in with the sugar first will prevent any clumping.
Add the sugar mixture to the cherries, add the lime/lemon juice and zest, and stir.
Set aside for around 10 minutes to juice.


Preheat the oven to
400° F
While your filling is juicing away, assuming an hour has passed, take out your pie dough.
Let it come to temperature for somewhere around 5 to 10 minutes. There are a million ways to roll out pie dough- Here's how I did it, take from it what lessons you will:
For the larger ball of dough:
Flour the counter, for added non-stick factor, lay down a sheet of parchment paper or plastic wrap and flour that.
Flour your rolling pin
Apply even, gentle pressure and roll in one direction out from the center.
Pick up the dough (gently) and rotate it a quarter turn, and roll out from the center again.
Repeat until the dough is about 1/4 inch thick.
Gently pick up the parchment and slide dough off on to your pie dish.
Trim any excess and set aside the scraps with the smaller ball of dough.
Shape your pie crust edges in a fancy fashion, or leave it all rustic-like.
At this point, I added the filling.

Top crust:
Roll out the dough as above.
With a pastry cuter or a sharp knife, cut 1/2 inch strips (about four of them, six if you have a larger pie dish)
Take the strips and lay half of them in one direction vertically across your filled pie.
Fold every other of those strips back, and lay one strip horizontally across.
Replace the folded back vertical strips, and repeat with the ones you didn't fold back.
Lay another horizontal strip across, and replace the folded back strips.
Repeat this until it looks roughly like this:


And yes, I was going for rustic.
Also, it was after midnight at this point.
hmph.
Brush your work of art with soy milk (coconut milk would also be fantastic) and sprinkle with sugar.

And now, we're going to bake this sucker.
Set your pie on a tinfoil-lined sheet pan, and use a piece of tinfoil to tent over the top of the pie. You don't want to seal it to the pie plate, you just want to cover the crust so it doesn't burn.
Place on center rack in the over and bake for 30 minutes.
Lower the oven temperature to 375
° F, and rotate the pan 180°
Remove the tinfoil on top, and bake for about 35 - 40 minutes until crust is golden brown, and filling is thick and bubbly.
A-like so:


I recommend soy whip, or some non-dairy ice cream goodness of the vanilla variety as a Coup de grâce.


Monday, July 20, 2009

Angry Dumplings

Perhaps, Wrathlings...
I came back from Jersey with many things, including a curious pairing of Chinese broccoli and wonton wrappers. My first instinct was to treat both ingredients exclusively. Maybe some sweet dumplings somewhere down the line, and to probably
sauté Chinese broccoli with olive oil, garlic, and sesame seeds: "But that's what what you do with all your vegetables" was the instant complaint. Fine. I'll poke around and pout a bit.
While searching (and pouting), I came across a
Recipe that used both. Flipping through it, I quickly realized I didn't have any of the additional ingredients. No go - more pouting.

So I stared at this

and these


and some odds and ends from my fridge, and came up with:


Angry Dumplings

1 bunch of Chinese Broccoli (8 cups chopped)
1 package of Tempeh (8 oz - chopped / crumbled)
1 package wonton wrappers
1 medium yellow onion (chopped)
4 or 5 cloves garlic
1 cup vegetable broth
1/4 cup soy sauce
1 tsp of red pepper flakes (1/2 tsp if you don't like it as hot. More if you do! Hey, that's why I call them angry)

First of all, have you got something else to do today? Also, a comfortable kitchen table / chair combo will come in handy for the copious amounts of dumpling folding. Anyone owe you favors? You might want to call them in for that part. Seriously. A pound of wrappers. Nothing to sneeze at.

For the filling:
Chop the onion and garlic ( I used a garlic press for this recipe) and sauté in olive oil in a deep saucier until translucent.
Add the chopped tempeh and allow to brown. It's okay if it crumbles further in the process.
Once the tempeh is slightly brown, add the soy sauce, vegetable broth, pepper flakes and stir to combine.
Add the chopped Chinese broccoli and cover. Before you stir it, let it wilt a bit. It won't be as dramatic as you'd think, this stuff is hearty. Give it about 2-5 minutes covered, then stir to incorporate all the ingredients.
Do not overcook the Chinese broccoli! You want it to keep green, so keep the cooking time short. About 5 minutes should do it.
Remove from heat and let the filling cool. If you're in a rush, spread it out in a large pyrex.

Folding the dumplings:
Have a small bowl of water on the ready
Take one teaspoon of the filling and place in the center of the wrapper. Do not be tempted to overfill these, it will only end badly. Do not. You were warned.
With a fingertip, wet the edges of the wonton wrapper and fold in half (to for a triangle)
Push any excess air out, and seal the edges.
You can leave them as is, or get fancy. I took the two edges, and folded them into the middle- Woo. Fancy.

Frying the dumplings:
This is the potsticker method that gives you a lovely crust on the bottom.
In a large stainless steel frying pan over medium heat, brush a thin layer of canola oil.
Arrange the dumplings in the pan and allow to quickly sear for 1 to 2 minutes.
Carefully add a few tablespoons to 1/4 a cup of water and quickly cover.
Allow to steam for between 3 to 5 minutes- the dumplings will become translucent.

Other Options?
Steam them the whole way.
Add them to soup.
Freeze them because you have so many dumplings.
So many.
So very many.
I mean: Yay! Dumplings!

Sunday, July 12, 2009

Raspberry Cake, Fresh From the Fields

Even if those fields were New Jersey.

This cake was from cradle to belly.
They began here:

Picking berries in the afternoon sun with Emily was lovely, even if the heat makes us (me) grumpy.
Fun as all get out and rewarding, now the question was: I have amazingly fresh berries, what do I do with them? I need something no fail, something I know will be awesome. I need Smitten Kitchen. This is the Raspberry buttermilk cake, and it is phenomenal. In fact, that whole damned site is phenomenal.
To Veganize Said Phenomenal RecipeThe 1/2 cup buttermilk becomes: 1/2 cup soy milk plus 1 tablespoon lime or lemon juice. Do this before hand and set aside until it separates.
The 1/2 stick butter becomes: a half stick (4 Tablespoons) of Earth Balance (from Trader Joe's)
The egg becomes: 1 tsp of Egg Replacer(essentially additional leavening. I omitted the water, and added the tsp directly to the other dry ingredients. You can get this at Whole Foods)


and there you have it! Follow the recipe with the vegan tweaks, scatter the raspberries across the top.


Bake at 400° F for 20-25 minutes, or until a toothpick inserted in the center comes out clean- (I found for a 9 inch pan, you'll get a beautifully done cake in about 20-22 minutes)
It'll look a little something like this
Help yourself to a piece

And know that we are not messing around here. You need to make this. Your life, so far, has been incomplete without this. Fix that.

In the meantime, Hungryface is now open! 


Thursday, July 2, 2009

Scrambled

It is time for vegan training wheels, also known as: scrambled tofu.

Yeah, it's no Tofu Wellington- but it is the building block of vegan cuisine. Or, you know, possibly proof that I do in fact, make more than just sweets.
Maybe.
It's a good staple to have, regardless. Sometimes you want to whip up a crazy strudel, sometimes not so much. This can be as simple or as complicated as you like, (virtually) anything knocking around your fridge can go in this. I ran with zucchini, because they were in season, and we had a ton.

The most important step to this dish is: draining the tofu. You see that puddle that the (extra firm) tofu is swimming in? That is not flavor, you don't want that.


Cut the tofu in half:

Then cut the halves in half. Now that you've got it into manageable chunks, you want to get rid of as much water as possible. This is the setup I use:
Fold a clean kitchen towel in half and place half of the towel on the cutting board, draping some excess off. On top of that, put a layer of paper towels, and place the tofu pieces on that. Put a paper towel on top of of the tofu, and fold the excess kitchen towel over the top. The tofu is now sandwiched in between paper towels & kitchen towels to absorb any water that comes out. Now you need to apply pressure. I use a 9x9 glass baking dish with four cans of beans for weight- as an extra bit, I put a heavy book on top of it all.
Still there?
It looks like this:

Awesome.

Anywho, actually making this stuff:

Scrambled

Oil for frying
2 Cloves of garlic (to taste)
1 Medium yellow onion
1 Tub (16 oz) of the drained extra firm tofu
2 zucchini (or any combo of veggies you like)

Spices

Cumin
Turmeric
Thyme
Fresh Parsley

Chop the garlic and onions, and whatever veg you've decided on. Set the veg aside for later.
In a large sauté pan, add enough oil to cover the bottom and add the onions and garlic.
Cook on medium low until the onions are translucent, careful not to let the garlic burn
Scootch the onions etc to the sides of the pan and add the tofu.
Up the flame to medium and let the tofu get a bit of a nice color going.
Add the spices. As far as spices go for this: I like a lot of cumin, a little less thyme, and enough turmeric for color, It's not an exact science. Add a bit of salt.
Scootch the tofu aside and add the veg to the center of the pan.
Let cook on it's on until slightly softened, then stir to incorporate
Salt & pepper to taste.
Shred a bunch of fresh parsley over the top and enjoy!