I've been thinking about this for a long time, likely years. Maybe I do struggle to maintain a positive outlook, but I console myself with the fact that I do struggle, rather than submitting to the alternative. It wasn't until I had a conversation with a co-worker that the dimmest of light bulbs illuminated weakly in my brain, and I'm still trying to grasp the depth of it. We started talking about the convention of summer-weight sweaters, something that's always confounded me, but is useful in corporate casual dress. Most people get cold in the office a/c, but I prefer it cold, to which she responds:
'Oh, I love the summer. I love the hot, sticky, sweaty heat of it. It's what summer is supposed to be. I also love the winter, when it gets cold and you can cuddle up in blankets and sweaters. '
Momentarily dumbfounded, I realize: 'That's the best outlook I've ever heard. Thank you.'
It was simple, it was straight forward, it was flat-out obvious, and it was still amazing.
Enjoy everything.
I wish five days of the week away in favor of the all too brief two that never live up to the expectation and weight that I put on them. I live a life so far out of balance, but I don't have to. I started this food blog to keep my creativity alive, to keep my love of food and writing fresh. When that started to dwindle, I started Hungryface bakery, and became a contributor to other food related websites. While it's important, it's not enough to only focus on the things you love, then you may miss out on the whole picture. Largely, the lesson isn't what you want to hear; it's the good and the bad. Sure, this is kind of psych 101, sitcom opening theme song bullshit, but you don't really think of it. There is probably no way to write this that doesn't sound cheesy or heavy-handed, so I'll be as honest as I can.
I had a hard quarter. Hell, few quarters. I missed some obvious things. I made a bunch of mistakes. I hated my life, and then I started giving in to hating everything. I watched the sun rise for the last three weeks with a furrowed brow and grim slate mask of a face; but during those three weeks I watched the sun rise. I sang in my car. I had time to think, be alone, listen to what I wanted, belt out a tune without being judged or shy (and my goodness I have some pipes on me) I saw the stars before they faded, that intense blue just before dawn. All of those things alone are beautiful. So you're a little sleepy, you're supposed to be! Anyone who's chirpy at sunrise should not be trusted (and I say that wryly) Take the time took at what you're seeing, you may never see it again.
It's not easy to find the good, or even the modicum of importance, in all things, but it may be the most worthwhile thing. The rain feels good on my head. Today nothing hurts. It took me twenty minutes to recognize someone I worked with for at least two years, but in the end, I recognized him. I had a really good meal in an unexpected place with the person I love. I learned something new, even if I didn't want to. I made a mistake, but now I know how to avoid it in the future. I can ask questions instead of just saying yes. I can say no. I love saying no.
NO.
I can brown pseudo-butter then infuse that pseudo-butter with basil, then mix that into blueberry cookies.
Going to play for the work BBQ? Put your all into it! Going to take photos of it? Make sure you capture the dedication they played with.
I got a bunch of ash in my hair, but got some pretty cool pictures out of it.
I drive past this most days. I finally stopped to take pictures of it. It's has been decaying for a while, and slowly taken apart- but look at it.
Cause it's pretty freaking cool, in its own transient way.
Did you know a lot pine is edible? What does it taste like?
Kind of citrus-y as it turns out. Something unplaceable, but not at all as abrasive as you would think. Make your own extract and put it in the background of a peach and almond cake, you've got something pretty damned unique.
If you take too many self portraits, fuck it! Take some more. Play around, do something weird. Do whatever the hell you want.
Sure this is obvious at times- but what if it needs to be? What if that's what gets the wheels turning onto something bigger? What if that's the momentum you need to pull yourself out of your well worn rut? Well then it's worth it. Every little thing. Every stupid bump and stumble is worth it. Take what you can and move on, but enjoy everything. You don't have to be a sickening ray of sunshine, but you can swelter with the best of them, grab an icy beverage, put on your swank sunglasses, and enjoy the hell out of it.
Friday, July 5, 2013
Monday, June 3, 2013
The Key Lime Challenge, Hell is Full of Tiny Limes
Hell is full of tiny limes. At first you may look upon them as these green jewels that promise you that coveted tart and tangy goodness, but soon you realize, the seeds. The SEEDS.
Have I learned my lesson from sour cherry pie? Obviously not. So when my husband's boss challenged me to make key lime bars for her vegan-disdaining family, how could I resist? My pride will eventually be my downfall; but not today. Not today.
First, you have to find the damned things, which proved more difficult than I originally thought. I found blood oranges through cherimoyas, but no key limes. I'm not going to call something Key Lime if it isn't made with key limes, there is some honor left in me after all. Mind you, I have no qualms about using regular ol' limes in this; but then I'm going to call it: Regular ol' Lime Bars. After I was finally able to procure them (thanks, husband) I was able to begin the task at hand.
For these bars, I used a shortbread cookie crust that I cut with lime zest/juice. You can use your favorite cookie or pastry crust here, but I won't divulge my own. A girl has to have some secrets.
Preheat your oven to 350° F. Go find your favorite base, dock it with a fork, bake it in a 13X9" pan until just under done, then round up the following:
Key Lime Bars
1/2 cup Key Lime or Regular ol' Lime juice (don't be disingenuous)
Zest of about 8 Key Limes, or 3 Regular ol' Limes
1 cup of Raw Cashews, soaked for at least 2 hours (until soft) in water
1 and 1/3 cup Sugar
2 Tblsp Coconut Cream
1 Tblsp Cornstarch
First things first, if you haven't already, start soaking your cashews in enough water to cover. This can go from 2 hours, to overnight if you're that organized. This is a useful component when you want to make a custard, but you don't feel like using tofu, or have soy allergies. We've used it in the past for coconut creme pie as well. When you can squeeze them and they crumble, you're good to go.
Now if you chose key limes, you get put to task. See all these tiny cute things?
Don't be fooled! Each of these is at least 80% seeds. Grab a comfy chair, and put on some good background telly; you're going to be here for a while. If you chose regular limes, high five! You don't get to use the elitist name of key lime, but you also miss out on most, if not all, of the seeds.
What have we learned? Invest in juicing equipment of some sort. My set up was not very sophisticated, and brute strength is not the best juicer. Also, try not to zest your hands off.
Once your cashews are ready, take all of your ingredients (cashews, lime zest/juice, sugar, coconut cream, and cornstarch) to your food processor or blender and blend the hell out of it.
Blend it so hard. I mean, we want a smooth filling here, so taste to make sure no solid cashew pieces remain. A word on coconut cream: where I am, the local Trader Joe's sells cans of it. It's fantastic, thick bordering on solid, and rich like nobody's business. If you can't find it on its own, refrigerate a can of full fat coconut milk the night before, and skim the top of the solid goodness from there.
Pour your smooth filling over your shortbread/cookie base.
In your 350° F oven, bake for 25-30 minutes, or until custard is set. Once cooled, cut into bars and dust with powdered sugar and extra lime zest, if you're fancy like that.
I did that for the husband's boss, but for me? I'm eating them before they've even cooled.
That first bite is what I like to call: Baker's tax.
Tuesday, May 14, 2013
Introducing your Salad to the Skillet, a Warmed Brussels Sprout Salad
My fridge has two phases, and only two phases. It is either a ghost town, containing only a few sparse items that I don't even remember purchasing; or stuffed to the gills, where it's impossible to find that one ingredient you're looking for, but here, have some buffalo style eggs, because that's a thing that exists. I'm convinced I have a phantom shopper, a bizarrely sadistic phantom shopper at that.
This weekend was one of those sparse phases, and I was left with some carrots, a bag of Brussels sprouts (season schmeason) and an interesting frozen blend of farro and red rice that I'd been wanting to play with. You can use any frozen/fresh grain variety you'd like. Cooked spelt berries would work nicely here, but even barely or a brown rice would do. Hell, you can even break out the couscous, but we all know that's not a grain. Since Brussels Sprouts are secretly part of the cabbage family, you could sub them out for kale or Napa cabbage. Flexibility is a beautiful thing.
Now I'm all for salads, especially with farmer's market season just opening up, but I wanted to jazz it up a little bit. Sure, salads are usually healthy, but why don't we toss a fried element in there for the heck of it? Fried things. Don't fight it. Embrace it.
Warmed Brussels Sprout Salad
1 cup Brussels Sprouts
2 large carrots
1 Spring onion or Scallion
2 cups of your favorite grain blend (Spelt berries, farro, brown rice)
Juice of one Lime
3 Tablespoons Earth Balance
Pistachios (optional)
Salt/Pepper to taste
Prep your veggies first. Cut the root ends off of your sprouts and discard. Shred the sprouts and set aside for later.
Peel your carrots. Once the outer skin is gone, peel the flesh until you get to the cores (you'll notice the color change in the center) Set your ribbons aside.
Chop up your onion or scallion, while you're at it.
Cook your grain blend to package directions, or be a hero and do it from scratch. I'm an anti-hero, I microwaved mine and was done in two minutes. Who's laughing now?
Combine your grain, carrots, and onions in your serving bowl and mix thoroughly.
In a large heavy skillet, melt your earth balance over medium high heat. Yes, you could use olive oil, but I like the richness that the Earth Balance adds here.
Once melted, toss in the shredded sprouts and salt/pepper them to taste.
Leave them be for a few minutes, until they brown a little bit, then hit them with the juice of one lime; De-glazing style. See what we're doing here? The pseudo-butter acts as the oil, and the lime juice acts as the acid component/vinegar. We're dressing the salad in one fell swoop.
Pour the hot contents of the pan over your grain mixture, and combine.
I became obsessed with having seeds/nuts in my salad years ago, so I add pistachios here. I regret nothing.
Labels:
brussels sprouts,
carrots,
farro,
fired,
grains,
lime,
pistachios,
red rice,
salad,
skillet,
spring onions,
vegan
Tuesday, April 30, 2013
A Simple Taste of Springtime
Peas are a rare treat that remind you, after a month or two of indecision, that it's finally spring time. They have a short window of sweet goodness to grasp at, so when I see them I snatch them up. The one thing I always seem to forget is, no matter how cute the little suckers are, no matter how sweet, you still have to shell the darn things. Like pitting sour cherries, or juicing key limes, it's the seasonal treat you love, and love to hate. So pull up a chair, and get set to mutter at these sassafrassing good fer nothin' tasty treats, because you only get so long to do so.
I know you can buy them already shelled, but I like to pretend there's a certain freshness you gain on the journey from pod to pea (though I've got nothing to back that one up)
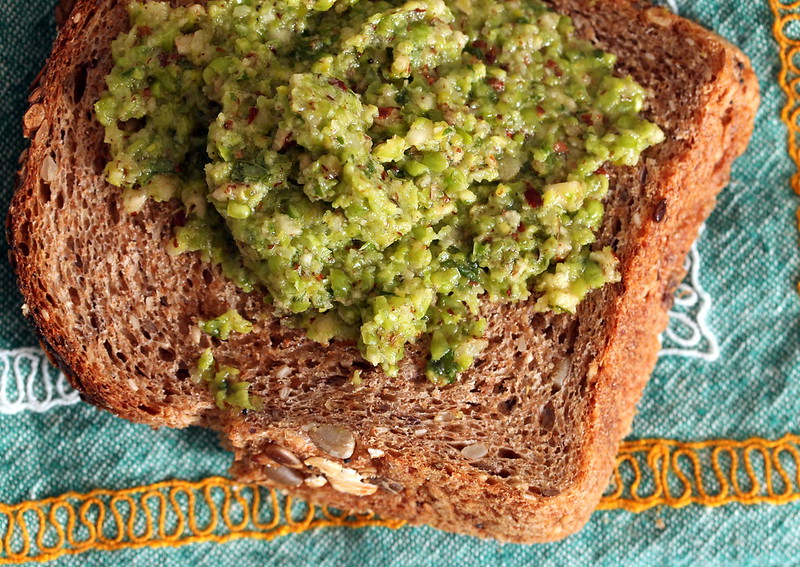
No soup here, but a spread, and a darned simple and tasty one. Do yourself a favor first, spring on some fancy bread. I don't want to see any bargain brand white defacing your table when only something artisanal, or at least multigrain, will do. Personally, I picked up some million grain/seed bread at the year round New Haven Farmer's market (Sono Bakery)
Of course, I'll gnaw on the stuff the whole ride home too, but whatever was left I slathered with this green goodness. You can easily scale this recipe up, depending on both your bounty, and patience for shelling the things.
Spring Peas, If you Please
1 cup Shelled peas
1/3 cup Hazelnuts
1 Tablespoon Fresh lemon juice
5 Leaves or so of Fresh mint
Extra virgin olive oil to combine
Salt/Pepper to taste
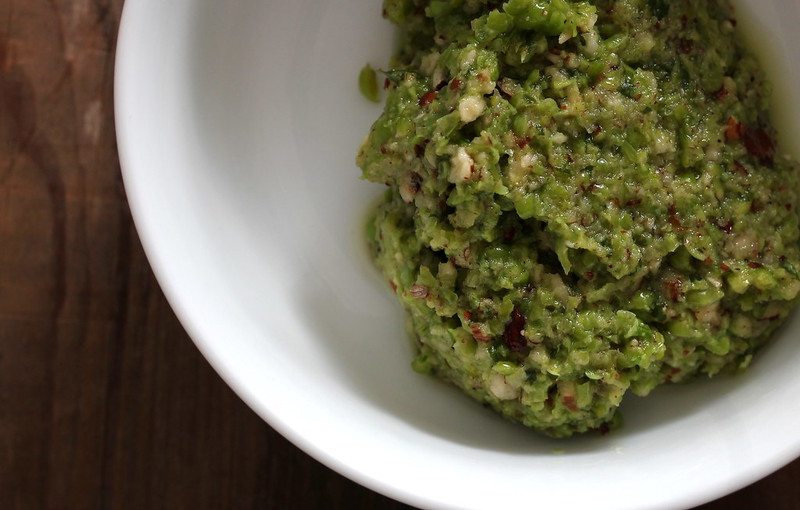
I tried a fork, a foodmill, and then resigned myself to food processor. Fresh peas are nothing if not resilient. Combine the peas, hazelnuts, lemon juice, mint, and salt/pepper in the food processor and get to whizzing. Slowly drizzle in the olive oil while running until a cohesive paste forms. You can add more, depending on the consistency you want. I left mine a paste chunky enough to stand up to the bread.
Rustic, verdant, and literally easy peasy. Celebrate the soon to open farmer's markets/farm stands (so exciting!) without even having to turn on your oven, or break a sweat.
Labels:
hazelnuts,
healthy,
lemon,
mint,
peas,
snack,
springtime,
vegan,
whole grain
Tuesday, March 19, 2013
Double Wides, a Cookie for Everything You're Craving
Some days, your muse speaks to you from a place deep, dark, and tucked away in the recesses of your subconscious. Maybe it's a part of you you didn't even know existed, maybe it's the childhood self you denied, but it was lurking there, waiting for the opportune moment, say 3AM, to strike. I want potato chips! It says. I want peanut butter! It demands. I want chocolate! It wails.
I WANT ALL THREE! It bellows.
It's okay, dark, twisted, childhood self; I'm on-board with this crazy, calorie-packed roller coaster of delight. After all, a life of moderation is a life un-lived.
Now we come to how we construct this dark carnival sideshow of a taste sensation. I feel like everyone needs more cookies in their life, and really, it's hard to go wrong with a cookie. Portable, portion-controlled, joy-inducing, and they even give you a modicum of, at least perceived, restraint.
Therefore, our stage is to be set on a humble looking, light cookie. First things first though, we begin with our filling.
Make some room in your fridge, and park this there for about a half an hour. While you wait, let's get started on those cookies!
Do you remember those mass-marketed, lightly crisp, vaguely chocolatey (unless you got the double-stuffed, we have to cede that we at least remember them to be tasty) cookies from those-who-shall-not-directly-be-named? Only better, we'll call them Forlis (adapted from this awesome post)
While these cool, it's time to make the ganache! There's a method to our madness, after all.
In a pyrex, or heat safe bowl, combine your chocolate chips, salt, and bourbon. Heat your coconut milk, and the microwave is fine for this, and pour over the chips. Let it sit for a bit, and then stir. Stir like you've never stirred before. In the beginning, it will look messy and non-congruent, but keep going and it will become glossy and beautiful. Set this aside to cool; if you're as impatient as I am, put it in the freezer.
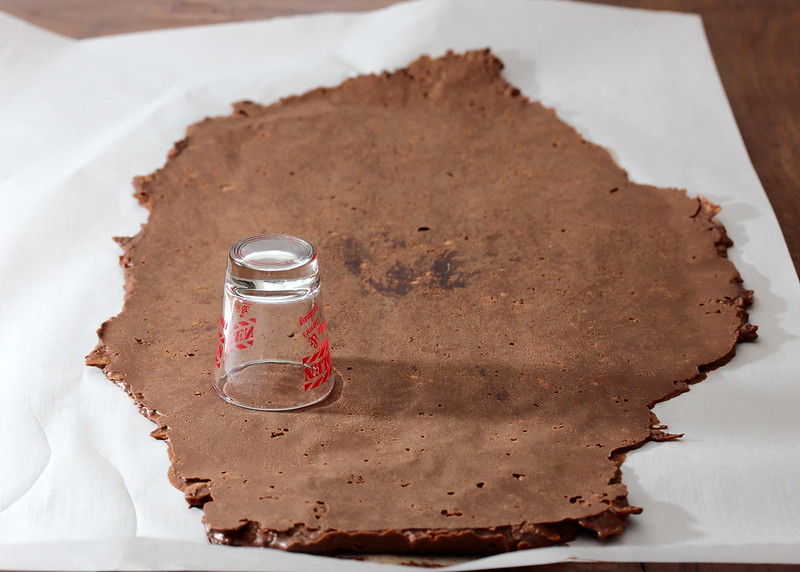
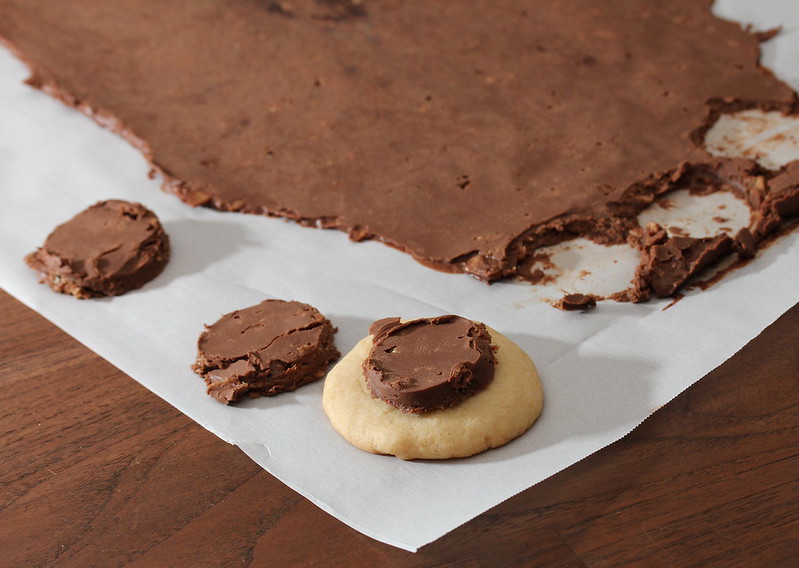
Now it's time for the assembly line. Fetch your filling and notice that it has become a solid mass. You can now cut it into circles to adorn your cookies. I used a shot glass.
Make absolutely sure your cookies are cool! Else all is for naught, and woe shall dog you with each day that passes, until happiness is no more. You didn't come this far for a slap-dash effort in the end.
Assemble them exactly like you think you would.
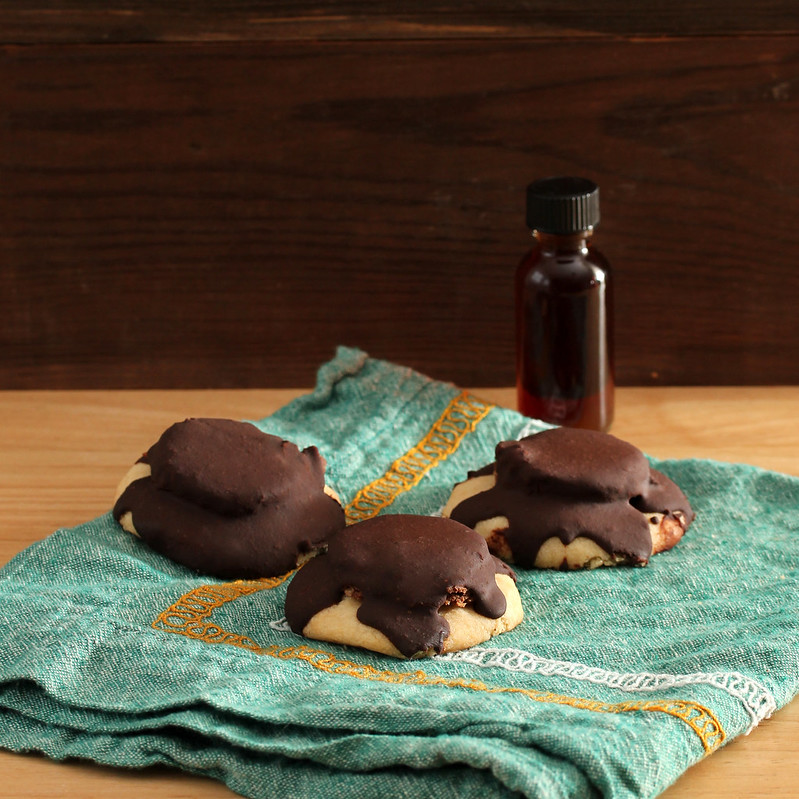
Also, see how bad I am at gauging sizes. It's fine, they wind up looking like little UFOs, and I'm at peace with that.
Once your ganache has cooled, coat the cookies in the velvety goodness. In the end, your efforts will yield this beauteous monster.
Salty-sweet, chocolaty, and crispy bits dispersed throughout. Satisfying on all levels, and maybe just a little bit embarrassing to explain to your coworkers, who should really just be left in staggering awe.
Just don't forget- when you gaze long into the abyss, the abyss also gazes into you.
I WANT ALL THREE! It bellows.
It's okay, dark, twisted, childhood self; I'm on-board with this crazy, calorie-packed roller coaster of delight. After all, a life of moderation is a life un-lived.
Now we come to how we construct this dark carnival sideshow of a taste sensation. I feel like everyone needs more cookies in their life, and really, it's hard to go wrong with a cookie. Portable, portion-controlled, joy-inducing, and they even give you a modicum of, at least perceived, restraint.
Therefore, our stage is to be set on a humble looking, light cookie. First things first though, we begin with our filling.
Double Wides
The Filling
3/4 cup Smooth peanut butter
1/2 cup Dark or bittersweet chocolate chips
1/2 cup Potato chips
There really is nothing more satisfying than using most, if not all, of a jar of peanut butter in one go. Smack the 3/4 cup of peanut butter down in a large mixing bowl. In a separate heat-proof bowl, melt your chocolate chips in the microwave in 30 second bursts. Zap for 30 seconds, mix, zap for another 30 seconds, and mix. Do this until they have melted. If it's largely melted, but you still see some chip forms, keep stirring. The residual heat in the mixture should be able to melt those last stubborn ones.
Mix your melted chocolate into the peanut butter with your favorite spatula.
Here's where we add the potato chips. I chose a plain kettle style chip. What happens if you use jalapeno flavored chips? What happens indeed. They'll break up as you stir them. If not, they'll definitely break up in the next step.
Once your filling is all mixed up, lay it out on a sheet of parchment paper, and cover it with another sheet of parchment paper. Roll that beast of a filling out until it's about 1/4 of an inch thick.
Do you remember those mass-marketed, lightly crisp, vaguely chocolatey (unless you got the double-stuffed, we have to cede that we at least remember them to be tasty) cookies from those-who-shall-not-directly-be-named? Only better, we'll call them Forlis (adapted from this awesome post)
'Forli' Cookie Foundation
2 cups Flour
1/2 tsp Salt
1-1/2 tsp Baking powder
1/4 tsp Baking soda
1-1/2 stick (12 Tablespoons) Earth Balance
3/4 cup Sugar
2 tsp Vanilla
1 tsp Fresh lemon juice
2 Tablespoons Coconut milk
Preheat your oven to 325° F/ 163° C
Combine your dry ingredients in a bowl and mix to incorporate. In the bowl of your stand mixer, or with some elbow grease, a fork, and some patience, cream your earth balance and sugar until light and fluffy. Add in your vanilla, lemon juice, and coconut milk and mix a bit more. Add in your dry ingredients slowly (low speed if using a mixer) a third at a time. If at any point, the mixer gives you trouble, use your hands instead.
Portion your dough out in silver dollar sized flattened circles on a parchment or silicone lined baking sheet, and bake for 15-18 minutes. Cool on a rack.
Simplistic Ganache
1/2 cup Chocolate Chips
3/4 cup Coconut milk (heated)
pinch of salt
1 or 2 tablespoons Bourbon (If you're going to go, go big)
In a pyrex, or heat safe bowl, combine your chocolate chips, salt, and bourbon. Heat your coconut milk, and the microwave is fine for this, and pour over the chips. Let it sit for a bit, and then stir. Stir like you've never stirred before. In the beginning, it will look messy and non-congruent, but keep going and it will become glossy and beautiful. Set this aside to cool; if you're as impatient as I am, put it in the freezer.
Now it's time for the assembly line. Fetch your filling and notice that it has become a solid mass. You can now cut it into circles to adorn your cookies. I used a shot glass.
Make absolutely sure your cookies are cool! Else all is for naught, and woe shall dog you with each day that passes, until happiness is no more. You didn't come this far for a slap-dash effort in the end.
Assemble them exactly like you think you would.
Also, see how bad I am at gauging sizes. It's fine, they wind up looking like little UFOs, and I'm at peace with that.
Once your ganache has cooled, coat the cookies in the velvety goodness. In the end, your efforts will yield this beauteous monster.
Salty-sweet, chocolaty, and crispy bits dispersed throughout. Satisfying on all levels, and maybe just a little bit embarrassing to explain to your coworkers, who should really just be left in staggering awe.
Just don't forget- when you gaze long into the abyss, the abyss also gazes into you.
Friday, March 15, 2013
We Nerded Out for Pi π Day on CraveLocal.com
Whether or not you're brave enough to admit it, deep in your heart, you know that March 14th isn't just any other day. It's Pi (π) day.
A day based solely on the love of the mathematical constant
representing the ratio of the circumference of a circle to its diameter.
Before Pi, March 14th was just another day, now, it's a reason to make
pie. If you're that special combination of awesome that happens to
recognize the significance of the day, or you're looking to impress a
somewhat nerdy lover, it's time to break out your apron and horned
rimmed glasses, we've got some work to do.
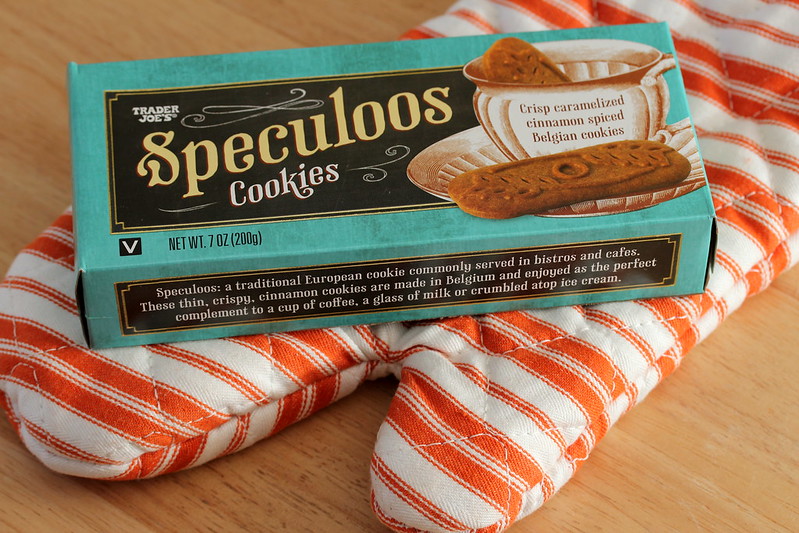
Though you may not have noticed it, or perhaps you're an unfortunate that doesn't have a local Trader Joe's, the chain has decided to up the ante on awesome. They've come out with a store brand of the somewhat elusive Biscoff, that also happens to remain vegan.
These cookies have a cinnamon-y depth, almost a rich caramel flavor that is absolutely begging to be pie crust. You see, as much as I may like to consume it, pie just doesn't flow as easily or as naturally as the other desserts. I've met the beast that is pie crust head on, battled a fortnight, and in the tired, bruised end, emerged the winner. Can I do it? Sure! Do I want to? How about a cookie crust? As a bonus, these make a killer base for coconut creme pie. Put down that rolling pin and trust me, I only want what's best.
Preheat your oven to 375° F
Now to start off, there's no soy in this pie, but it's a custard. How do we work this wizardry? We soak some cashews! Abra-ca-soak!
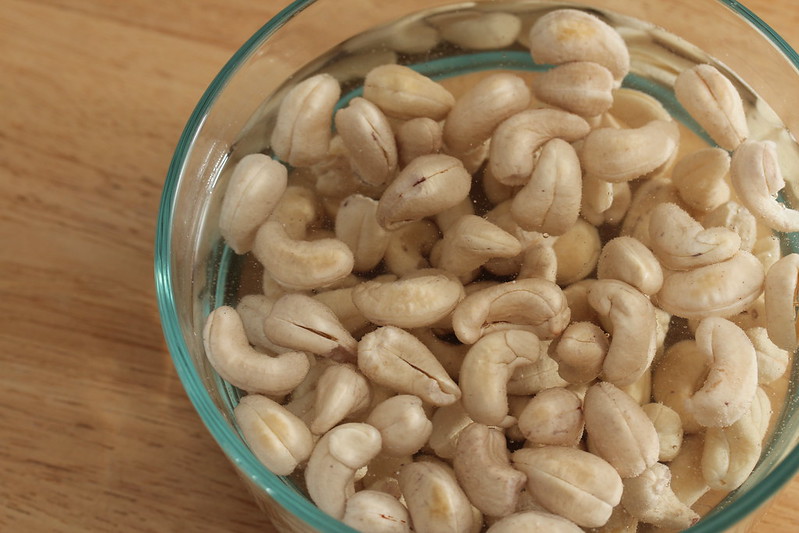
This is a cup of cashews in enough water to cover them, for about two hours. You can test the readiness by taking one out and squeezing it. If it splits, crumbles, or yields in any way, you're ready.
In the meantime, take your entire pack of cookies for a spin in your food processor or blender. Combine these with your melted coconut oil or margarine, and press down into a greased 9" pie plate. Pop this in your oven for 10 minutes to set it.
Once your cashews are properly soaked, blend them with about 1/3 cup of water in a food processor or blender to form a loose puree, or cream. This will take a bit, you're looking for smoothness. If it's balling up on you, add a few more tablespoons of water.
In a large bowl, pour your coconut milk, custard powder (or cornstarch), and whisk like nobody's business. If you're using the Bird's custard powder, you'll notice a delightful shade of pale orange, but just keep whisking until there are no lumps of dry powder.
As far as solid coconut oil goes, I have a gallon tub of the stuff. I'm very serious about my coconut oil. Because my vessel is so large, I can scrape what i need with a spoon to get curls of solid oil. For a mason jar of coconut oil, scoop out enough spoonfuls for the 1/3 of a cup, then break that mass down into chunks. The end goal is to evenly distribute the oil through the rest of the custard, like a colloidal suspension. Come on, it's Pi day, you need to geek it up a bit. Add the solid coconut oil, coconut creme, vanilla, and shredded coconut, and whisk like you mean it.
Once that's nicely combined, add in your cashew cream, and resume whisking.
Now that one arm is really strong, you're ready to go. Gently pour your custard into your pie crust. Don't just dump it in there like some brute.
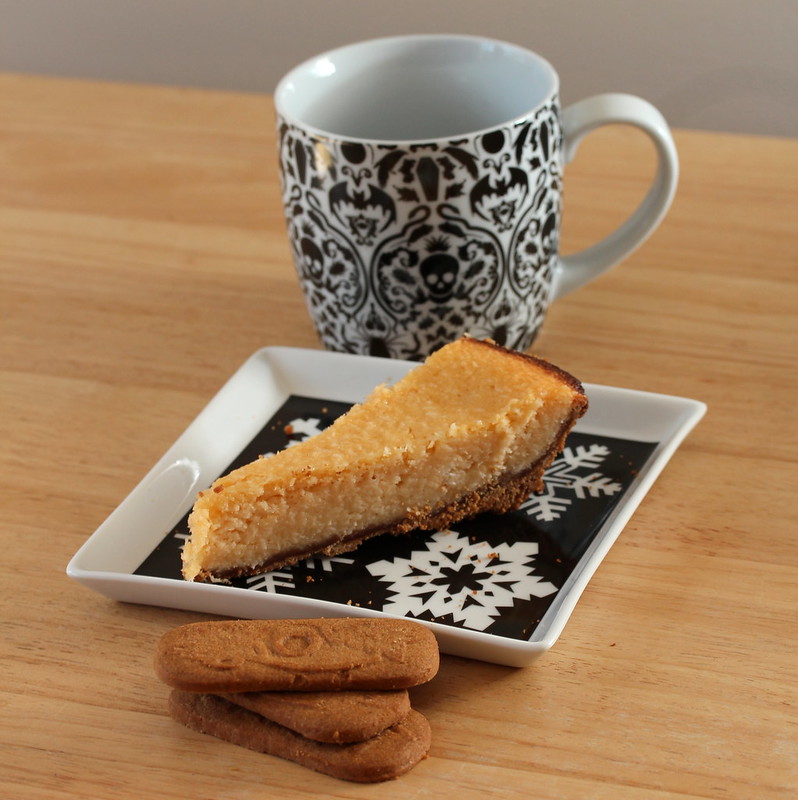
Bake this wonderful representation of a mathematical constant for 35-40 minutes. When you pull it out, it shouldn't jiggle wildly, only slightly. Cool on a wire rack.
Now this is important, it smells wonderful, and it tastes pretty good warm from the oven, but leave it alone! This pie does beautifully chilled over night in the fridge. It sets the custard, allows it to relax, and for the flavors to develop. It really does a world of difference chilled overnight in both flavor and texture. I can't stress that enough. In fact, bake it the day before Pi (π)day, so you can spend the actual day languishing in the glory that is this pie.
If you recite it to the 5th decimal point by heart, you can reward yourself with another slice!
Though you may not have noticed it, or perhaps you're an unfortunate that doesn't have a local Trader Joe's, the chain has decided to up the ante on awesome. They've come out with a store brand of the somewhat elusive Biscoff, that also happens to remain vegan.
These cookies have a cinnamon-y depth, almost a rich caramel flavor that is absolutely begging to be pie crust. You see, as much as I may like to consume it, pie just doesn't flow as easily or as naturally as the other desserts. I've met the beast that is pie crust head on, battled a fortnight, and in the tired, bruised end, emerged the winner. Can I do it? Sure! Do I want to? How about a cookie crust? As a bonus, these make a killer base for coconut creme pie. Put down that rolling pin and trust me, I only want what's best.
Coconut Creme Pie
(because I haven't had one in about 14 years and that just ain't right)
1 cup cashews (soaked for at least 2 hours)
1 15 oz can of Coconut milk
1 cup Sugar
Scant tsp Salt
1/4 cup Bird's Custard Powder (You can sub cornstarch in a pinch)
2 tsp Vanilla extract
2 tablespoons Coconut Cream
1/4 cup of Coconut oil (broken into small pieces, not melted)
2 cups Unsweetened shredded coconut
1 Pack Speculoos cookies (or any cookie that strikes your fancy)
2 Tablespoons melted coconut oil or margarine (to mix with the crumbled cookies)
Preheat your oven to 375° F
Now to start off, there's no soy in this pie, but it's a custard. How do we work this wizardry? We soak some cashews! Abra-ca-soak!
This is a cup of cashews in enough water to cover them, for about two hours. You can test the readiness by taking one out and squeezing it. If it splits, crumbles, or yields in any way, you're ready.
In the meantime, take your entire pack of cookies for a spin in your food processor or blender. Combine these with your melted coconut oil or margarine, and press down into a greased 9" pie plate. Pop this in your oven for 10 minutes to set it.
Once your cashews are properly soaked, blend them with about 1/3 cup of water in a food processor or blender to form a loose puree, or cream. This will take a bit, you're looking for smoothness. If it's balling up on you, add a few more tablespoons of water.
In a large bowl, pour your coconut milk, custard powder (or cornstarch), and whisk like nobody's business. If you're using the Bird's custard powder, you'll notice a delightful shade of pale orange, but just keep whisking until there are no lumps of dry powder.
As far as solid coconut oil goes, I have a gallon tub of the stuff. I'm very serious about my coconut oil. Because my vessel is so large, I can scrape what i need with a spoon to get curls of solid oil. For a mason jar of coconut oil, scoop out enough spoonfuls for the 1/3 of a cup, then break that mass down into chunks. The end goal is to evenly distribute the oil through the rest of the custard, like a colloidal suspension. Come on, it's Pi day, you need to geek it up a bit. Add the solid coconut oil, coconut creme, vanilla, and shredded coconut, and whisk like you mean it.
Once that's nicely combined, add in your cashew cream, and resume whisking.
Now that one arm is really strong, you're ready to go. Gently pour your custard into your pie crust. Don't just dump it in there like some brute.
Bake this wonderful representation of a mathematical constant for 35-40 minutes. When you pull it out, it shouldn't jiggle wildly, only slightly. Cool on a wire rack.
Now this is important, it smells wonderful, and it tastes pretty good warm from the oven, but leave it alone! This pie does beautifully chilled over night in the fridge. It sets the custard, allows it to relax, and for the flavors to develop. It really does a world of difference chilled overnight in both flavor and texture. I can't stress that enough. In fact, bake it the day before Pi (π)day, so you can spend the actual day languishing in the glory that is this pie.
If you recite it to the 5th decimal point by heart, you can reward yourself with another slice!
Friday, March 8, 2013
A Subtle Green and Promises of Spring Proven False
St Patrick's day is nearly upon us, and some may find themselves
shuddering at the thought of green bagels and green beer being pushed
upon them at every turn. Skip out of the passive voice and take control
of your life! If you're not at peace with dumping who-knows-what into
your food to achieve that lurid shade of green we've all come to know
and love/dread around this time of year, but don't want to appear
snobbish in the face of all the festivities; don't worry, there are
alternatives.
How about Green Tea Cake with Blueberries; because that conniving, two-faced rodent of a groundhog said that it would be spring by now, and I'm going to bake a springtime cake as though it isn't snowing like the dickens outside.
While 'Culinary green tea' is a distinction that concerns me, and I'm left wondering what other grades of green tea lurk in the shadows, it is readily available in Asian markets, as well as online super stores. It is indeed a powerful mojo, so make sure you have a steady hand while applying it. This recipe will give you a subtle green hue, accentuated by the fresh blueberries, and very much a calling card of the spring you were promised so long ago.
Preheat your oven to 350° F/ 176° C and grease a 9" round pan.
In a large bowl, combine your coconut milk, oil, sugar, and vanilla. In a separate bowl, combine your flour, almond meal, matcha powder, salt, and baking powder and mix until well incorporated.
Add the dry to the wet in batches, mixing just enough to incorporate. Once the two are combined into a batter, toss in your blueberries and gently fold in.
Pour the batter into your prepared pan and bake for 30 - 40 minutes, or until an inserted toothpick comes out clean.
Once the cake has cooled, 15 minutes in the pan, then completely on a rack, decorate as you will. I dusted mine daintily with powdered sugar and sprinkled with sliced almonds before I devoured it.
The end result is light and fluffy, the flavors grassy, with a well rounded sweetness. Green enough to happily join in the festivities, but not so green that you hate yourself in the morning.
How about Green Tea Cake with Blueberries; because that conniving, two-faced rodent of a groundhog said that it would be spring by now, and I'm going to bake a springtime cake as though it isn't snowing like the dickens outside.
While 'Culinary green tea' is a distinction that concerns me, and I'm left wondering what other grades of green tea lurk in the shadows, it is readily available in Asian markets, as well as online super stores. It is indeed a powerful mojo, so make sure you have a steady hand while applying it. This recipe will give you a subtle green hue, accentuated by the fresh blueberries, and very much a calling card of the spring you were promised so long ago.
Green Tea Cake with Blueberries
1 and 1/2 cups Flour
1/2 cup Almond meal
1/2 tsp Salt
1 Tablespoon Baking powder
1 to 1.5 tsp Culinary grade green tea/ matcha powder
1 cup Sugar
1 and 1/4 cup (2.95 dl) Coconut milk
1/4 cup (.59 dl) melted Coconut oil (or canola/vegetable)
2 tsp vanilla extract
1/2 cup Fresh blueberries
Powdered sugar to dust
Sliced almonds for garnish
In a large bowl, combine your coconut milk, oil, sugar, and vanilla. In a separate bowl, combine your flour, almond meal, matcha powder, salt, and baking powder and mix until well incorporated.
Add the dry to the wet in batches, mixing just enough to incorporate. Once the two are combined into a batter, toss in your blueberries and gently fold in.
Pour the batter into your prepared pan and bake for 30 - 40 minutes, or until an inserted toothpick comes out clean.
Once the cake has cooled, 15 minutes in the pan, then completely on a rack, decorate as you will. I dusted mine daintily with powdered sugar and sprinkled with sliced almonds before I devoured it.
The end result is light and fluffy, the flavors grassy, with a well rounded sweetness. Green enough to happily join in the festivities, but not so green that you hate yourself in the morning.
Subscribe to:
Posts (Atom)